


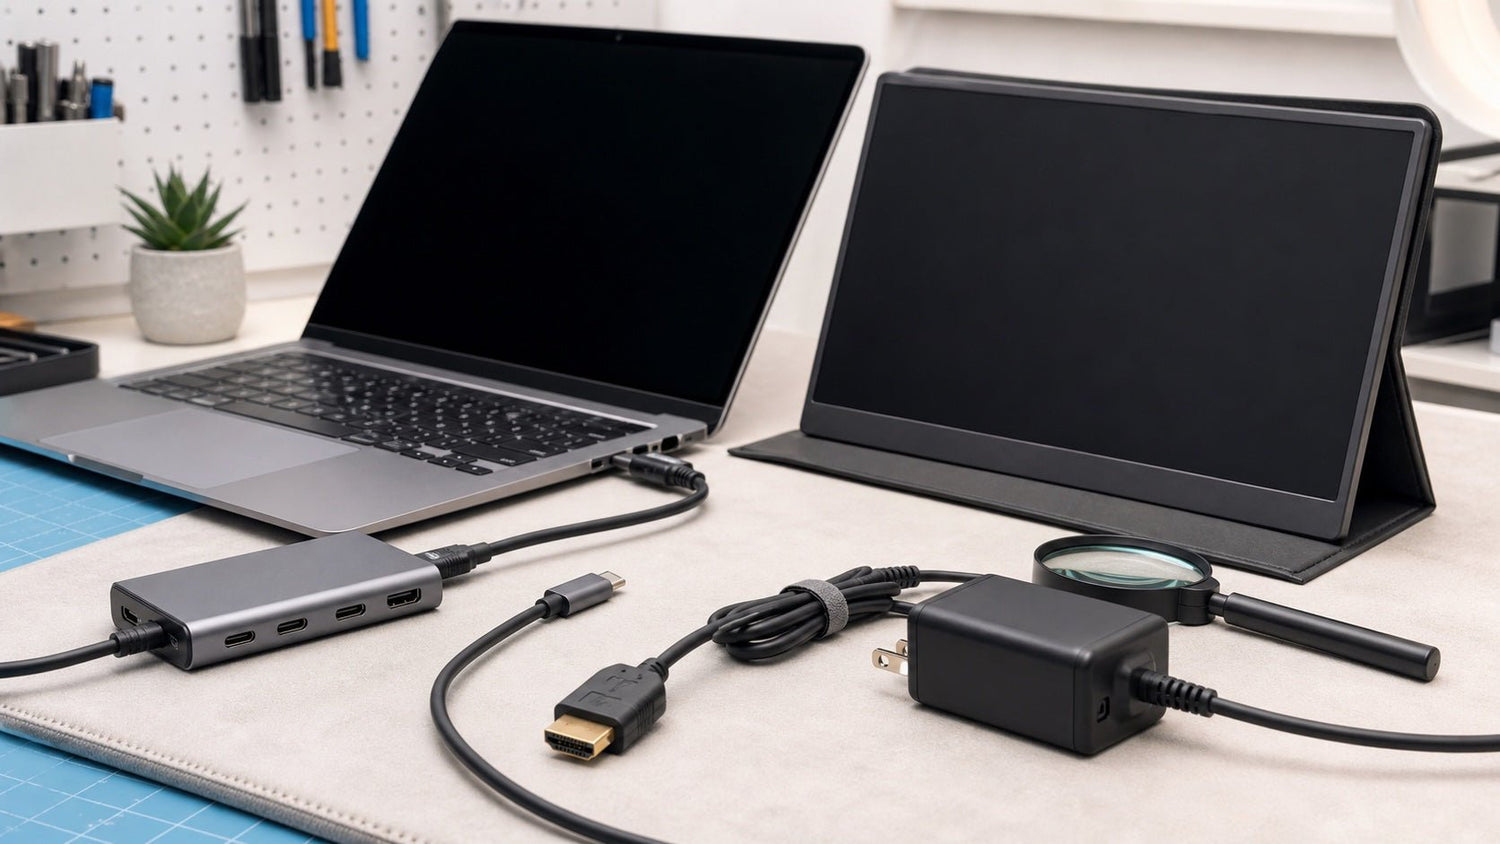
If your laptop screen extender is not detected, first identify whether it has no power, displays “No Signal,” or is completely absent from Windows or macOS display settings.
These symptoms are related, but they do not mean the same thing:
- No power usually points to the power adapter, power cable, or power connection.
- “No Signal” means the screen is powered but is not receiving usable video.
- Not detected by the operating system can indicate a port, cable, input, driver, permission, or display-support problem.
Start with a direct connection, stable power, the correct input source, and a verified video-capable cable. Do not assume that the screen extender is defective until you have tested the laptop, cable, port, and extender separately.
Identify the Exact Failure Before Troubleshooting
The screen’s behavior can quickly narrow down the cause.
| Symptom | Most Likely Category | First Check |
|---|---|---|
| No indicator light or backlight | Power | Power adapter, power cable, and power input |
| Screen turns on but shows “No Signal” | Input or video path | Selected input, laptop port, and video cable |
| Backlight is visible but no image appears | Signal or display configuration | Direct connection and operating-system settings |
| Display is absent from Windows or macOS | Port, driver, permission, or compatibility | Display detection and connection requirements |
| Display appears in settings but remains inactive | Operating-system configuration | Extend mode and display arrangement |
A power light confirms only that the screen is receiving some electricity. It does not confirm that the laptop is sending video.
Similarly, “No Signal” usually indicates that the screen is working well enough to turn on, but it cannot find video on the selected connection.
Follow This Five-Minute Diagnostic Reset
Begin with a complete reset before reinstalling drivers or changing advanced settings.
- Shut down or restart the laptop.
- Disconnect the screen extender from the laptop.
- Disconnect external power, docks, hubs, and video adapters.
- Wait approximately 30 seconds.
- Connect the extender to external power if the setup requires it.
- Connect the video cable directly to the laptop.
- Turn on the screen extender and select the correct input.
- Open the laptop’s display settings and check for the screen.
This reset removes unnecessary devices from the signal path and allows the laptop and extender to establish a new power and video connection.
Check the Power Connection
A screen extender may need more power than one laptop port can reliably supply. Some setups receive video from the laptop but require a separate connection for power.
Check the following:
- Confirm that the power cable is fully inserted.
- Use the supplied power components when available.
- Connect power to the designated power input rather than an unrelated USB-C port.
- Remove low-quality hubs and extension cables.
- Disconnect unnecessary USB devices during the test.
- Check whether the screen’s indicator light or backlight changes when external power is connected.
Do not use an assumed wattage for every screen extender. Power requirements can vary by model and connection method. Check the documentation for your exact INVZI model before replacing the charger or power adapter.
A screen that turns on is not necessarily receiving enough power for complete operation. However, if it shows a stable “No Signal” message, the next priority should usually be the input source and video path.
Confirm That the Correct Input Is Selected
A powered screen may display “No Signal” because it is monitoring a different input from the one connected to the laptop.
For example, the extender may be set to HDMI while the active connection uses USB-C. Automatic input switching may not always select the correct source after a cable is removed, the laptop wakes from sleep, or the connection method changes.
Use the extender’s controls to select the input that matches the connected cable:
- USB-C
- HDMI
- Another supported source listed in the model documentation
After selecting the input, disconnect and reconnect the video cable. If necessary, turn the extender off and on once.
Button locations and menu names differ between models, so refer to the instructions for the exact screen extender rather than assuming that all INVZI products use identical controls.
Verify That the Laptop Port Supports Video
A USB-C connector does not automatically provide display output. Depending on the laptop, a USB-C port may support charging, data, video, or a combination of these functions.
Try each potentially compatible USB-C, Thunderbolt, USB4, or HDMI port on the laptop. If more than one USB-C port is available, do not assume that they have identical capabilities.
For a USB-C connection:
- Connect the extender directly to the laptop.
- Try another USB-C port.
- Check the specifications for the laptop’s exact model number.
- Look for confirmed DisplayPort Alt Mode, Thunderbolt, USB4 display support, or USB-C video output.
- Avoid relying only on the connector’s physical shape.
For a detailed port-compatibility check, see how to check whether your laptop’s USB-C port supports display output.
If the extender works through HDMI but not through USB-C, the USB-C port may not support native video, the cable may not carry video, or the selected setup may require additional display software.
Rule Out the Cable, Adapter, or Dock
The cable and every device between the laptop and extender must support the required connection.
Start with the supplied cable when it is available. Otherwise, use a cable that is explicitly verified to support video. A USB-C cable can provide power without carrying a display signal, so successful charging is not proof that the cable supports video.
For a deeper explanation, read why a USB-C cable can charge but fail to display video.
Use the following isolation process:
- Remove USB-C extension cables.
- Remove the dock or hub.
- Remove unnecessary video adapters.
- Reseat both ends of the cable.
- Inspect connectors for visible damage or debris.
- Test another verified video-capable cable.
- Test USB-C and HDMI separately if both are supported.
Change only one component at a time. If you replace the cable, dock, power adapter, and connection method simultaneously, you may restore the display without learning what caused the problem.
A direct laptop-to-extender connection is the most reliable baseline test. If that connection works, reconnect the dock, adapter, or hub individually to identify the incompatible component.

Fix a Screen Extender Not Detected in Windows
Windows may recognize the physical connection without automatically enabling the external display.
Check Windows display settings
- Open Settings.
- Select System.
- Select Display.
- Find Multiple displays.
- Select Detect if the screen is not listed.
- Check whether the external display appears in the arrangement.
Press Windows key + P and select Extend. If PC screen only is selected, the external display may remain inactive even when Windows recognizes it.
When multiple numbered displays appear, select Identify to match the displays in Windows with their physical positions.
Check Device Manager
Open Device Manager and review:
- Display adapters
- Monitors
- Universal Serial Bus controllers
- Display-related software devices, when applicable
Look for:
- A warning icon
- An unknown device
- A disabled display
- A graphics or USB device reporting an error
Start with Windows Update and the official driver supplied by the laptop manufacturer, graphics manufacturer, or required display-technology provider.
Do not download drivers from unverified third-party driver websites. Uninstall or reinstall a device only when the official instructions for the relevant laptop, graphics hardware, or display technology recommend that step.
Restart Windows after installing or updating a required driver.
Check for managed-device restrictions
On a company or school laptop, administrator permissions and security policies may prevent:
- Driver installation
- USB display software installation
- Application startup at login
- Access to new USB devices
- Required software permissions
In that situation, contact the organization’s IT administrator rather than attempting to bypass the restrictions.
Fix a Screen Extender Not Detected on macOS
Open Apple menu > System Settings > Displays and check whether the extender appears.
If it is missing:
- Leave Displays settings open.
- Hold the Option key to reveal Detect Displays, where available.
- Select Detect Displays.
- Disconnect and reconnect the extender.
- Confirm that the screen is powered and using the correct input.
- Restart the Mac.
- Test a direct connection without a dock.
If the extender appears in Displays settings, review the arrangement and confirm that it is configured as an extended display rather than being disabled or mirrored unexpectedly.
Check the Mac’s external-display support
The number of external displays supported by a Mac varies by model, processor, connection type, resolution, and display configuration.
Do not rely only on the name “MacBook Air” or “MacBook Pro.” Check the technical specifications for the exact Mac model and chip.
A screen extender that contains multiple displays may require more display outputs than the Mac supports natively. Depending on the extender and Mac, additional screens may require a software-assisted connection method.
Review permissions only when software is required
If the setup instructions for the exact extender require a display application, open:
System Settings > Privacy & Security
Then review only the permissions requested by that application. A software-assisted display application may require permission such as Screen & System Audio Recording before it can display the desktop.
Native HDMI, Thunderbolt, USB4, or DisplayPort Alt Mode connections do not automatically require this permission.
Check Whether Display Software or a Driver Is Required
Screen extenders can use different display technologies.
Some configurations receive native video through:
- HDMI
- DisplayPort Alt Mode over USB-C
- Thunderbolt
- Compatible USB4 display output
Other configurations use software-assisted USB display technology, particularly when the laptop cannot natively drive the requested number of screens.
A software-assisted setup may require:
- An official driver or desktop application
- Administrator approval
- Permission to start at login
- macOS privacy permissions
- A restart after installation
- A compatible software version after an operating-system update
Do not assume that every INVZI screen extender requires a driver. Do not assume that every model is driver-free either.
Check the setup requirements for the exact model and connection method. Use only the official software source specified in the product documentation or support instructions.
Determine Whether the Laptop or Extender Is Causing the Problem
Cross-testing can separate a laptop-side problem from a cable or extender-side problem.
| Test Result | What It Suggests |
|---|---|
| The extender works on another compatible laptop | Check the original laptop’s port, settings, drivers, permissions, or display support |
| Another external display works on the original laptop | Check the extender’s power, input, cable, and required connection method |
| No known-working display works through one laptop port | The port may not support video or may have a system or hardware issue |
| One verified cable works but another does not | The original cable may be incompatible or damaged |
| The extender works directly but not through a dock | The dock may not support the required video path, power, or display capacity |
| The issue began after a system update | Check for a compatible graphics or display-software update |
When possible, complete these two tests:
- Connect the screen extender to another compatible laptop.
- Connect another known-working display to the original laptop.
Do not diagnose the extender as defective based on one failed connection. First test stable power, the correct input, a direct connection, and a verified cable.
Final Diagnostic Checklist
Complete these checks in order:
- Power: Confirm that the extender receives stable power.
- Input: Select the source matching the connected cable.
- Direct connection: Remove docks, hubs, and unnecessary adapters.
- Laptop port: Verify that the selected port supports display output.
- Cable: Use a known video-capable cable.
- Windows or macOS detection: Run the operating system’s display-detection process.
- Display mode: Select Extend and check the arrangement.
- Driver or software: Install only what the exact setup requires.
- Display support: Confirm the laptop’s supported number of external displays.
- Cross-test: Test another laptop, display, cable, or connection.
- Support: Provide the exact product and laptop details if the issue remains.
Following this order helps identify why a laptop screen extender is not detected without replacing hardware prematurely or changing unrelated settings.
Frequently Asked Questions
Why is my laptop screen extender powered on but not detected?
Power and video are separate parts of the connection. The extender may receive enough power to turn on while the laptop port, cable, adapter, or selected input fails to provide usable video. Verify the input source, connect directly to the laptop, and test a video-capable port and cable.
Why does my screen extender say “No Signal”?
“No Signal” means the extender is powered but cannot find video on the selected input. Check that the input matches the connected cable, reseat both cable ends, bypass the dock, and confirm that the laptop port and cable support video.
Can a USB-C cable charge a screen extender without carrying video?
Yes. USB-C is a connector type, and cables can support different combinations of power, data, and video. A cable may charge the screen extender while lacking the required video capability. Use the supplied cable or another cable explicitly confirmed to support video.
How do I detect a screen extender in Windows?
Open Settings > System > Display, locate Multiple displays, and select Detect if the option is available. Press Windows key + P and select Extend. If the extender remains absent, test a direct connection and check official graphics or display drivers.
Why does my Mac not detect the screen extender?
Open System Settings > Displays, hold the Option key, and select Detect Displays where available. Reconnect the extender directly, confirm the input and power, and restart the Mac. Also verify the number of external displays supported by the exact Mac model.
Does a laptop screen extender require a driver?
It depends on the model and connection method. Native HDMI, Thunderbolt, USB4, or DisplayPort Alt Mode connections may not require dedicated software. A software-assisted USB display configuration may require an official driver, application, permission, or administrator approval.

Leave a comment
This site is protected by hCaptcha and the hCaptcha Privacy Policy and Terms of Service apply.