


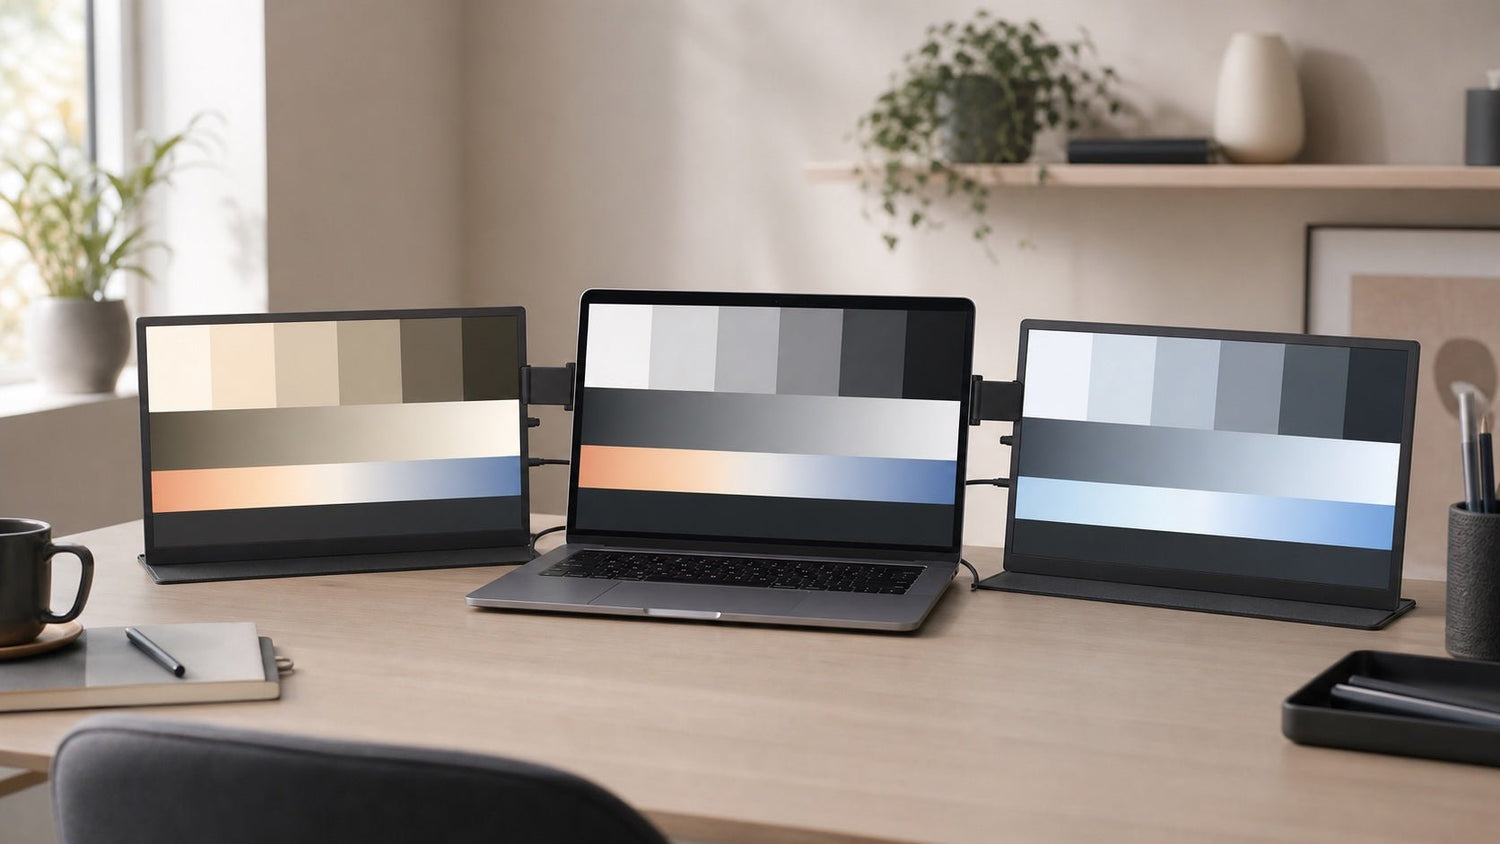
To match brightness between laptop and monitor screens—or a laptop and screen extender—first disable HDR, automatic brightness, Night Light, Night Shift, True Tone, and other adaptive effects. Show the same neutral test pattern on every screen and compare them from your normal working position. Match white brightness first, then check middle gray, highlights, shadows, and color temperature. Do not try to match the percentage values.
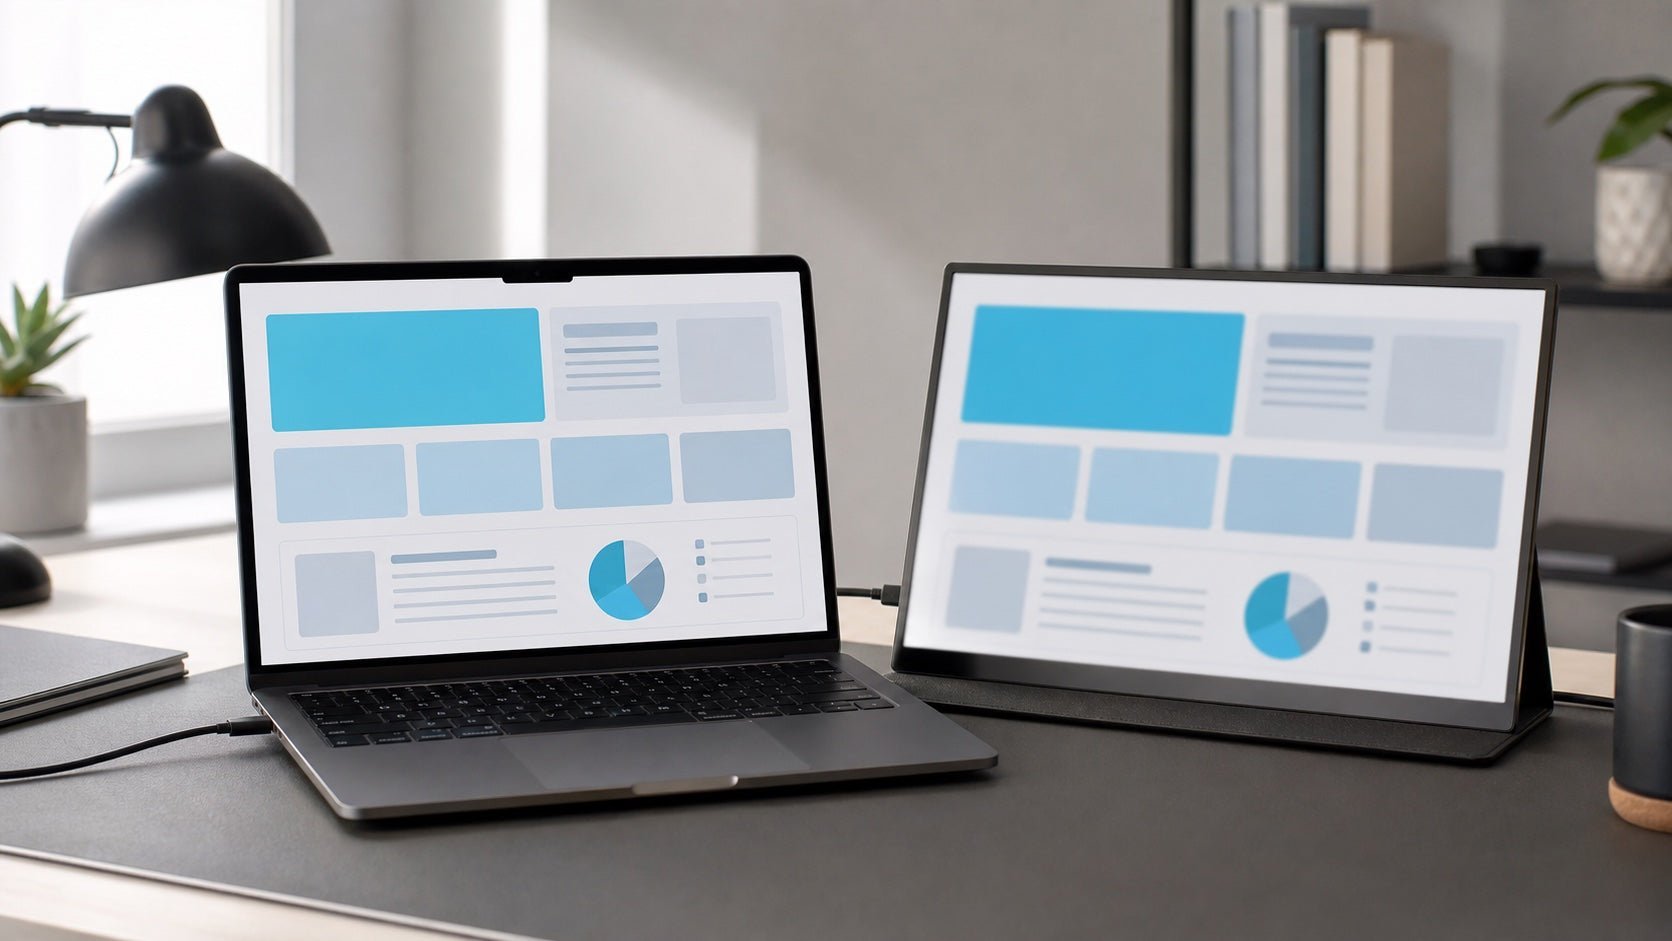
A white browser window may look neutral on your laptop but noticeably blue, yellow, or brighter on the screen beside it. A photograph can show clear shadow detail on one display and look muddy on another. Even moving a spreadsheet between screens may reveal that its pale-gray background changes color.
These differences are common. The goal is not to make two displays technically identical, but to make them visually consistent enough that moving your eyes or content between screens feels natural.
Why Your Laptop and Screen Extender Do Not Look the Same
Two screens can receive the same image signal and still produce different results. Their panel characteristics, light output, screen coating, picture mode, viewing angle, white point, tone response, and supported color range may differ.
The most common causes include:
- Different maximum brightness levels
- Different factory picture modes
- Different color-temperature or white-point settings
- Glossy and matte surfaces handling reflections differently
- One panel being viewed at a sharper angle
- HDR being enabled on only one display
- Automatic or content-adaptive brightness
- Windows Night Light or macOS Night Shift
- True Tone on supported Mac displays
- Eye-comfort, reading, blue-light, or dynamic-contrast modes
- Graphics-driver color adjustments
- Different display color profiles
- Uneven lighting or glare across the workspace
Brightness percentages are not standardized measurements. A 50% setting on a laptop does not necessarily produce the same visible light output as 50% on an external screen.
Brightness, contrast, white point, and gamma are not the same
| Display term | What it affects |
|---|---|
| Brightness | The screen’s overall light output |
| Contrast | The separation between bright and dark tones and the risk of clipping detail |
| Color temperature | Whether white appears warmer and yellower or cooler and bluer |
| White point | The specific color appearance of white |
| Gamma | How brightness is distributed through middle tones |
| Color profile | Software information describing how a display reproduces color |
A screen can match another screen’s white brightness while still displaying different middle grays, skin tones, or dark details. That is why brightness should be adjusted first, followed by tone and color.

Before You Adjust Brightness or Color
Prepare the workspace before judging either screen. Otherwise, temporary settings or reflections can make a correct display appear mismatched.
- Allow both displays to stabilize. Leave them on for several minutes before comparing them.
- Use your normal working position. Sit at the viewing distance and screen angles you use every day.
- Remove obvious glare. Avoid direct sunlight, bright windows, or lamps reflecting on only one panel.
- Use the recommended display resolution. An incorrect resolution is primarily a clarity problem, but a soft or scaled image can make visual comparisons less reliable.
- Temporarily disable adaptive effects. Turn off automatic brightness, content-adaptive brightness, HDR, Night Light, Night Shift, True Tone, reading modes, blue-light modes, and dynamic contrast where available.
- Choose the least processed picture mode. Standard or sRGB may be appropriate on some screens, but preset behavior varies by model. Avoid Vivid, Dynamic, Cinema, Game, and eye-comfort modes during the initial match.
- Record the original settings. Take a photograph or write down the existing brightness, contrast, color-temperature, and RGB values.
- Avoid an unnecessary factory reset. Resetting may erase a usable configuration and will not guarantee that two different panels look alike.
Do not begin while one display is automatically changing its brightness or color according to room lighting, battery use, or the content on screen.
How to Match Laptop and Screen Extender Brightness Step by Step
Choose one display as the visual reference. This should normally be the screen used for your primary task or the screen whose appearance you trust most. It does not automatically need to be the newer, brighter, larger, or more expensive display.
1. Show identical neutral content on every screen
Open the same test content on the laptop and extender. A useful test image should contain:
- Pure white
- Middle gray
- Several near-white tones
- Several dark-gray tones
- A smooth grayscale gradient
- Natural skin tones
- A familiar photograph with both bright and dark areas
Display the content at the same size and zoom level on every screen.
2. Compare the screens from your normal position
Do not move directly in front of each panel while judging it. A side screen may look different when viewed straight on than it does at its normal operating angle.
Position the extender panels as they will be used, then compare them while seated normally.
3. Locate the controls for each display
The laptop’s brightness may be controlled through the keyboard or operating system. An external display may instead use:
- Physical buttons
- An on-screen display menu
- A supported display-control utility
- Model-specific software
Operating-system brightness sliders do not control every external display. Check the documentation for the exact model when a control is unavailable.
4. Match perceived white brightness
Place the same white window on both displays. Reduce or increase the second screen until the two white areas appear similarly bright.
Ignore the percentage values. A laptop set to 40% may visually match an external panel set to 65%, or the reverse.
Avoid making either screen brighter than necessary for the room. The objective is a balanced and comfortable match, not maximum output.
5. Compare middle gray
Once white looks similar, examine a middle-gray background.
If white matches but gray looks noticeably lighter or darker, the screens may have different gamma, picture modes, black levels, or tone response. Check that both displays are using their least processed modes before changing advanced controls.
When a display offers several gamma presets, begin with its default or standard option. Do not change gamma simply because the numerical labels differ between screens.
6. Protect highlight detail
Leave the monitor’s contrast control at its default setting initially.
Use a test pattern containing several very light gray boxes against white. If the boxes merge into the white background, reduce contrast in small steps until the missing detail returns.
Do not increase contrast merely to make the image look more vivid. Excessive contrast can remove subtle detail from clouds, white clothing, documents, and bright interface elements.
7. Check dark-gray and near-black detail
Examine a pattern containing black and several very dark gray tones. You should be able to distinguish at least some separation between the darkest areas.
If a dark jacket, nighttime photograph, or shadowed interface loses detail on one display, check:
- Contrast
- Black-level controls
- Dynamic contrast
- HDR
- Graphics-driver adjustments
- Picture mode
Make small changes and compare again. Brightening the entire screen is not always the correct fix for crushed shadows.
8. Match the white appearance
After brightness and tone are reasonably close, compare a white page and middle-gray area for color casts.
- A blue-looking screen is visually cooler.
- A yellow or orange-looking screen is visually warmer.
- A green or magenta cast may require finer color adjustment.
Start with the closest color-temperature preset. Use individual red, green, and blue controls only when presets do not provide a close match.
9. Look away before the final comparison
Your vision adapts to a color cast or brightness difference after staring at it. Look away from the screens for 20 to 30 seconds, then compare them again.
Repeat this short visual reset after any significant color change.
10. Verify the result with everyday content
Test the screens with several familiar items:
- A document with a white background
- A spreadsheet with pale-gray cells
- A web page
- A grayscale photograph
- A photograph containing natural skin tones
- A dark image with shadow detail
A setting that works for only one highly saturated image is not a reliable match.
11. Save or record the finished settings
Record the final settings for the laptop and every external panel. This makes it easier to restore the workspace after a reset, software update, or temporary adjustment.
| What you see | Likely cause | Setting to check first |
|---|---|---|
| One screen is brighter overall | Different light output or automatic brightness | Brightness |
| White looks yellow or blue | Different color temperature or adaptive color feature | Color-temperature mode |
| Middle gray is too light or dark | Different gamma or picture mode | Picture mode or gamma preset |
| Bright details disappear | Contrast is too high | Contrast |
| Dark details disappear | Black-level or contrast problem | Black level, contrast, or dynamic contrast |
| Colors look unnaturally vivid | Vivid mode, HDR, or driver adjustment | Picture mode or HDR |
| The image changes from an angle | Panel viewing characteristics | Screen angle |
| Only one application looks different | Application color management or HDR behavior | Application and color-profile settings |
How to Match Multiple Panels on a Screen Extender
When a screen extender adds two or three displays, match one panel at a time.
Begin with the laptop and the screen used for your main task. Once those two look consistent, repeat the procedure for each remaining side or upper panel.
Compare every panel from its normal operating angle. A side display can appear lighter, darker, or less saturated as its angle changes, even when its settings remain unchanged.
Use this order:
- Position every panel for normal use.
- Choose the primary screen as the reference.
- Match the first extender panel.
- Match the next panel to the same reference—not to the panel adjusted immediately before it.
- Recheck all screens together.
- Record the setting for each panel separately.
Some screen extenders provide independent controls for each panel, while others share certain controls. Refer to the instructions for the exact model rather than assuming that one adjustment affects every screen.
How to Match Color Temperature and White Appearance
Color temperature describes whether white appears cooler and bluer or warmer and more yellow-orange.
First disable temporary warm-color features. Then compare:
- A neutral white browser page
- A middle-gray background
- A grayscale gradient
- Natural skin tones
- A familiar photograph
Start with the display’s color-temperature presets. Choose the option that most closely matches the reference screen under the lighting normally used in the room.
When the screen provides individual RGB gain controls, make only small corrections:
- If white looks too blue, reduce blue slightly before making larger changes elsewhere.
- If white looks too yellow or red, reduce red slightly or compare a cooler preset.
- If gray looks green, reduce green slightly.
- If gray looks magenta, check whether green has been reduced too far.
Change one channel at a time. Recheck both white and middle gray after every adjustment.
Large RGB changes can reduce usable brightness or create a new color cast elsewhere in the grayscale. Do not make major corrections based on one photograph.
There is no single visual setting that is ideal for every room and workflow. For everyday office work, matching the displays to each other under normal room lighting is generally more useful than forcing both screens to an arbitrary numerical target.
Windows Settings That Can Change Brightness and Color
In Windows, open:
Start > Settings > System > Display
Select the specific display near the top of the page before changing its settings. In a multi-screen setup, each connected display may have different available controls.
Check the following:
Brightness
The Windows brightness slider commonly controls the built-in laptop display. It may also control some supported external displays.
When the slider is unavailable for an external screen, use the screen’s buttons, menu, or supported utility. Microsoft notes that external monitors often require their own hardware controls.
Automatic and content-adaptive brightness
On supported computers, Windows may change brightness according to ambient light or the content being displayed. Disable these features temporarily while matching screens.
They can be re-enabled after the match, but doing so may allow the laptop panel to drift away from the external screen again.
Night Light
Night Light shifts the display toward warmer colors. Turn it off during matching so the laptop and external screen are compared without a scheduled color change.
HDR
For ordinary documents, web use, coding, and other SDR work, match the displays in SDR first.
If HDR is required, enable it afterward and evaluate HDR and SDR content separately. Windows provides display-specific HDR controls and an SDR-content brightness adjustment because SDR and HDR content can appear at different brightness levels on an HDR display.
Color profiles
Open the color-profile settings for the selected display and confirm that a profile intended for that display is being used.
A color profile describes how a screen reproduces color. It does not directly change the panel’s physical light output, and its visible effect may depend on whether the application uses color management.
Do not assign a profile made for a different monitor model. Use the profile supplied for the exact display or one created through a measured calibration process.
Graphics-driver controls
Intel, AMD, NVIDIA, or manufacturer utilities may provide additional brightness, contrast, saturation, gamma, and RGB settings.
Reset accidental driver-level overrides before making detailed adjustments through the monitor itself. Otherwise, the same image may be modified twice—once by the graphics software and again by the display.
A color mismatch is different from fuzzy text, uneven interface sizes, or incorrect DPI behavior. For those symptoms, follow INVZI’s guide to fix blurry text and display scaling instead of lowering the resolution or changing color controls.
macOS Settings That Can Change Brightness and Color
On a Mac, open:
Apple menu > System Settings > Displays
Select the laptop panel or connected display before changing its settings. The available options depend on the Mac, macOS version, connection, and external display.
Brightness
Use the brightness control for the built-in screen where available.
An external display may require its physical controls or a supported utility. macOS cannot control the hardware brightness of every external screen.
Automatically adjust brightness
Disable automatic brightness temporarily on supported displays. This keeps the laptop from changing while the external panel remains fixed.
True Tone
True Tone changes the display’s colors according to ambient lighting conditions. Turn it off while matching so the laptop’s white appearance remains stable. Apple lists True Tone as a display-specific setting, so it may not appear for every screen.
Night Shift
Night Shift shifts screen colors toward the warmer end of the spectrum. Turn it off during matching, particularly when comparing whites and neutral grays.
HDR
Disable HDR for the initial SDR comparison unless HDR is essential to the workflow. Once the SDR match is stable, test HDR separately on supported screens.
Presets and color profiles
Confirm that each display uses an appropriate preset or color profile. Some supported Apple displays use reference modes or presets that control several characteristics together, including color space, white point, gamma, and brightness.
Do not select a profile simply because its name sounds more accurate. Apple generally provides a recommended profile for a connected display, and profile options differ by hardware.
Display calibration
macOS can create a custom profile through its display-calibration tools on supported setups. Visual software calibration may improve consistency, but it is not equivalent to measuring the screen with a hardware colorimeter.
Match the Screens to Your Room, Not Just to Each Other
Ambient light affects how bright, warm, cool, and contrasty a screen appears.
A match created beside a bright window may feel too intense at night. A display placed beneath a warm household lamp may appear cooler than the same display under daylight. Reflections can also make one panel look washed out even when its settings are correct.
Use these practical guidelines:
- Keep strong window reflections off both screens.
- Avoid placing a lamp where it affects only one panel.
- Compare the displays under the lighting used for most of the working day.
- Do not perform the match in a dark room unless that is the normal workspace.
- Check side panels at their actual working angles.
- Consider separate daytime and evening presets when the room changes substantially.
Screen position also affects the result. Before repeatedly changing brightness, make sure the panels have sensible viewing distances and angles. INVZI’s guide can help you set up a comfortable dual-screen laptop workspace before completing the visual match.
When Visual Matching Is Good Enough—and When It Is Not
Visual matching is normally sufficient when the objective is comfort and everyday consistency.
| Visual matching is usually sufficient | Hardware calibration may be appropriate |
|---|---|
| Documents and email | Commercial photography |
| Coding | Print production and proofing |
| Spreadsheets | Professional video color grading |
| Online meetings | Client-approved brand colors |
| Studying and research | Product photography |
| General web use | Broadcast or cinema work |
| Non-critical social content | Cross-device color proofing |
A hardware colorimeter measures the display rather than relying only on visual judgment. It can help establish or verify white point, tone response, brightness, grayscale tracking, and a color profile for controlled workflows.
Even with careful adjustment, two different consumer displays may not become completely identical. Differences in panel behavior, black level, supported color range, coating, and viewing angle can remain.
For office work, coding, research, communication, and general content creation, the practical objective is a comfortable visual match—not laboratory-level equivalence.
Common Mistakes to Avoid
Using the same brightness percentage on every screen
Brightness percentages are device-specific control positions, not shared light measurements.
Changing several settings at once
Adjust brightness first, then tone and color. Changing brightness, contrast, gamma, and RGB together makes it difficult to identify which adjustment helped.
Matching while adaptive effects are active
Night Light, Night Shift, True Tone, HDR, automatic brightness, and dynamic contrast can alter the image during the comparison.
Raising contrast to make the image look stronger
Excessive contrast can remove highlight or shadow detail. Keep contrast at its default unless a test pattern shows clipping.
Using only one colorful photograph
A highly saturated image may hide problems in white, gray, and near-black tones. Use neutral test content as well.
Judging a panel from the wrong angle
A side display should be assessed from its normal working position, not only while viewed directly from the center.
Lowering resolution to correct color
Resolution changes image sharpness and scaling behavior. It does not directly fix brightness, white point, or color temperature.
Treating a profile as a brightness control
A color profile describes display behavior for software. It does not replace the screen’s physical brightness adjustment.
Copying another person’s settings
Settings from a different laptop, display model, room, or viewing angle may produce an unsuitable result.
Calling visual adjustment professional calibration
Visual matching can improve consistency, but it does not verify a display against a measured production standard.
A Five-Minute Brightness and Color Matching Checklist
- Place every screen under the same room lighting.
- Position the panels at their normal working angles.
- Use the recommended resolution on each display.
- Disable HDR, automatic brightness, Night Light, Night Shift, True Tone, and dynamic picture modes.
- Show identical white, gray, grayscale, highlight, and shadow test content.
- Choose the main-task screen as the reference.
- Adjust the second screen until white looks equally bright.
- Check middle gray and retain detail in near-white and dark-gray areas.
- Use the nearest color-temperature preset, then make only small RGB corrections if necessary.
- Look away briefly, verify the result with normal content, and record the final settings.
Frequently Asked Questions
Why does my external monitor look brighter than my laptop?
The two displays probably produce different light output at the same percentage setting. Their panels, picture modes, coatings, HDR behavior, and adaptive-brightness features may also differ. Disable changing display effects, show the same white and gray test content, and reduce the brighter display until both look balanced from your usual working position.
Should my laptop and monitor use the same brightness percentage?
No. Brightness percentages are not comparable measurements across different devices. A setting of 40% on one screen can appear brighter than 70% on another. Compare visible white and middle-gray brightness instead, then confirm that both bright and dark details remain distinguishable.
How do I match the color temperature of two screens?
Turn off Night Light, Night Shift, True Tone, and other warm-color features. Display the same neutral white and gray content on both screens, then choose the closest color-temperature preset on the external display. Make only small RGB adjustments when presets cannot produce a sufficiently close match.
Why does my laptop screen look warmer than my monitor?
A warm-color feature may be active, or the displays may use different factory white points. Check Night Light on Windows and Night Shift or True Tone on macOS. Then select neutral picture modes and compare the screens under stable room lighting.
Can I match two displays without a colorimeter?
Yes. Careful visual matching is generally sufficient for office work, coding, browsing, studying, meetings, and non-critical content creation. A colorimeter is more appropriate when the workflow requires measurable, repeatable color for print, commercial photography, product imaging, brand approval, or professional video production.
Should I turn off HDR before matching brightness?
For ordinary SDR work, yes—begin with HDR disabled. HDR can change how bright and dark content is displayed, and SDR content may use a separate brightness balance when HDR is active. Once the SDR match is stable, enable HDR only where needed and evaluate HDR content separately.
Why do colors change when I move a window between screens?
Each display can have a different white point, color range, picture mode, HDR setting, panel response, or color profile. Applications that use color management may also behave differently from applications that do not. Confirm the correct profile and picture mode for each display, then compare the same application on both screens.
Can two different displays ever look exactly the same?
Not always. Visual adjustment can make two screens comfortably similar, but differences in panel technology, black level, coating, color range, viewing angle, and tone response may remain. A closer technical match requires compatible display capabilities, controlled lighting, measurement hardware, and a color-managed workflow.
Match Brightness and Color One Setting at a Time
A consistent multi-screen setup starts with stable conditions: use the same room lighting, disable adaptive display effects, position every panel at its normal angle, and select one trusted screen as the reference.
Match white brightness first. Then inspect middle gray, highlights, shadows, and color temperature. Keep contrast near its default, make RGB changes conservatively, and record the final values for each panel.
This process is suitable for creating a comfortable and visually consistent workspace. It should not be described as professional calibration when no measurement hardware has been used.
Display controls vary by model. When comparing multi-screen options, review the available formats and model documentation across INVZI laptop screen extenders.
Recommended Original Image Assets
| Placement | Asset | Suggested alt text |
|---|---|---|
| Below the introduction | Side-by-side laptop and extender before and after matching | Laptop and screen extender before and after brightness and color matching |
| Before the step-by-step section | INVZI neutral display test pattern with white, gray, highlights, shadows, and grayscale | Display test pattern for matching laptop and screen extender brightness |
| In the multi-panel section | Diagram showing the order for matching left, center, right, and upper panels | Order for matching brightness across multiple screen extender panels |
| In the Windows section | Annotated Windows display, HDR, and color-profile settings | Windows brightness HDR and color profile settings for multiple displays |
| In the macOS section | Annotated macOS Displays settings with True Tone and Night Shift | macOS display brightness True Tone Night Shift and color profile settings |
| Before the FAQ | Printable five-minute matching checklist | Five-minute laptop and external display brightness matching checklist |

Leave a comment
This site is protected by hCaptcha and the hCaptcha Privacy Policy and Terms of Service apply.